Why did I intend to build a Hackintosh?
I highly recommend reading all my Hackintosh posts (and consult other tutorials) before you actually decide to build a Hackintosh. It is a rather tedious task. It might run straight-away. However, in my case – and also in the tutorials, I found on the Internet – it can frustrating at times. When I put into account the hours I spent building an experimental Hackintosh, it might have been less expensive buying an actual Mac from Apple. In addition, with every update, Apple releases you have to put in some extra work.
I use my 13″ MacBook Pro from 2016 (the first one with the touch bar) for software development. It is equipped with 16 GB of RAM and a Dual-Core i5. It has decent performance but still is a bit on the slow side. And with three VMs I’m using I had some serious crashes. Additionally, I mostly use in my home office – so I don’t need the portability of a notebook.
So what are the alternatives – and Apple iMac or iMac Pro? Both come with a built-in screen and I have an external monitor. An Apple Mac Pro? It is far too expensive. An Apple Mac mini? Too expensive and not up to date.
So recently my attention was drawn to some videos about a Hackintosh. I did some more research and to me, it seemed that these days it’s fairly easy to build one from PC hardware, especially if you stick with the hardware used in Apple computers.
Which Hardware did I choose?
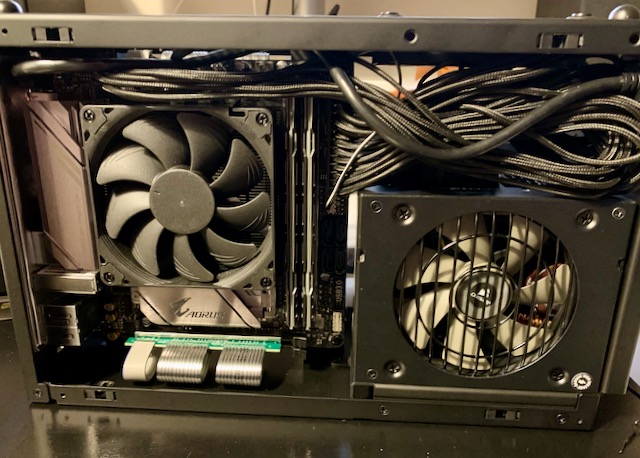
I found compatible hardware on tonymacx86’s page and bought the following hardware – I wanted to have a small powerful computer. I know that I could have used other hardware, e.g. an AMD Rizen with more parallel threads which might be more suitable for software development. However, my goal was to have a Hackintosh with as less trouble as possible in the future, so I stuck with the hardware Apple supports.
| CPU | Core i7-9700K |
| CPU-Cooler | Noctua NH-L9i |
| RAM | Crucial Ballistix Sport LT 32 GB |
| SSD | 970 EVO NVMe SSD, PCIe 3.0 M.2 Typ 2280 1 GB |
| Graphics Card | Gigabyte Radeon RX 5700 XT 8GB |
| Case | DAN Cases A4-SFX V4.1 Mini-ITX |
| Power Supply | Corsair SF Series Platinum SF750 |
| Mainboard | Gigabyte Z390 I Aorus Pro WiFi, Intel Z390 |
While installing the Software I learned that the WLAN / Bluetooth chip on the Gigabyte Z390 is not compatible with Mac OSX. In this case I could either exchange the chip with a Broadcom chipset or, as I am to tired to disabled the whole mainboard again, I went for a Bluetooth dongle and WLAN dongle as a temporary solution.
| Bluetooth Dongle | GMYLE Bluetooth Adapter Dongle |
| WLAN Dongle | TP-Link Archer T2U Nano AC600 |
I collected reasons for this choice on various websites
How I assembled the Hardware?
The assembly was pretty straightforward – with only minor annoyances. I used some videos from YouTube and the manuals. The DAN case is super-small but so extremely well organised that (almost) everything fits just perfectly. I assembled the parts in this particular order to avoid too much hassle (you only need a Philips screwdriver).
- Motherboard
- CPU (remove the plastic part und insert the CPU)
- RAM
- SSD (it’s under a heat sink)
- CPU Cooler
- Case (remove the side parts and the top part)
- Connector blend (attach it in the back of the case)
- Motherboard (attach it in the case)
- Power Supply (and connect it with the motherboard)
- Short Test with the Internal graphics card (check the bios settings if all the hardware appears)
- Graphics card (in the riser slot and connect it with the power supply)
These videos helped me. I highly recommend watching these videos before you assemble the hardware