Vagrant is a command-line tool to create virtual environments using a scripting language, i.e. with Vagrant you can create and configure virtual machines by using a text editor. The use of a text-file for configuration makes it easy to document the configuration, to work in collaboration and to store the configuration in a version control system. Vagrant makes it easy for developers to simulate a production environment on their local development machines.
Vagrant supports different providers out-of-the-box, such as VirtualBox and Hyper-V, others, such as VMWare, Docker, Google Cloud Platform or Amazon Webservices via plugins.
In this short tutorial, we will create a script to set-up two virtual machines, each with a different configuration to run them in a Virtual Box. We will later configure these two machines using Ansible to set-up a Jenkins server and an Integration environment.
Prerequisites
Before we start, please install VirtualBox on your local machine. If you encounter any problems during installation on a Mac you might consult this article. Subsequently, create a folder for the Vagrant configuration (I created a folder in/vagrant my home directory). Install Vagrant (on my Mac I use brew cask install vagrant).
Setting Up a simple Virtual Machine
The file that contains the configuration is named Vagrantfile. Use a text editor to create a Vagrantfile with the following content:
Vagrant.configure("2") do |config|
    config.vm.define "server1" do |web|
        web.vm.box = "ubuntu/xenial64"
    end
end
The (“2”) is the Vagrant version (the current version number is 2). The name encapsulated by the vertical lines is the name of the configuration (here “config”).
web.vm.box = "ubuntu/xenial64" defines the so-called box that we want to install on our Virtual Machine (VirtualBox), in our case a basic Ubuntu Linux. A box is basically a package format for the different environments (from different Linux distributions to fully provisioned environments, e.g. Jenkins or ELK stack). You will find these boxes in the Vagrant Cloud.
To install and run the VirtualBox, use
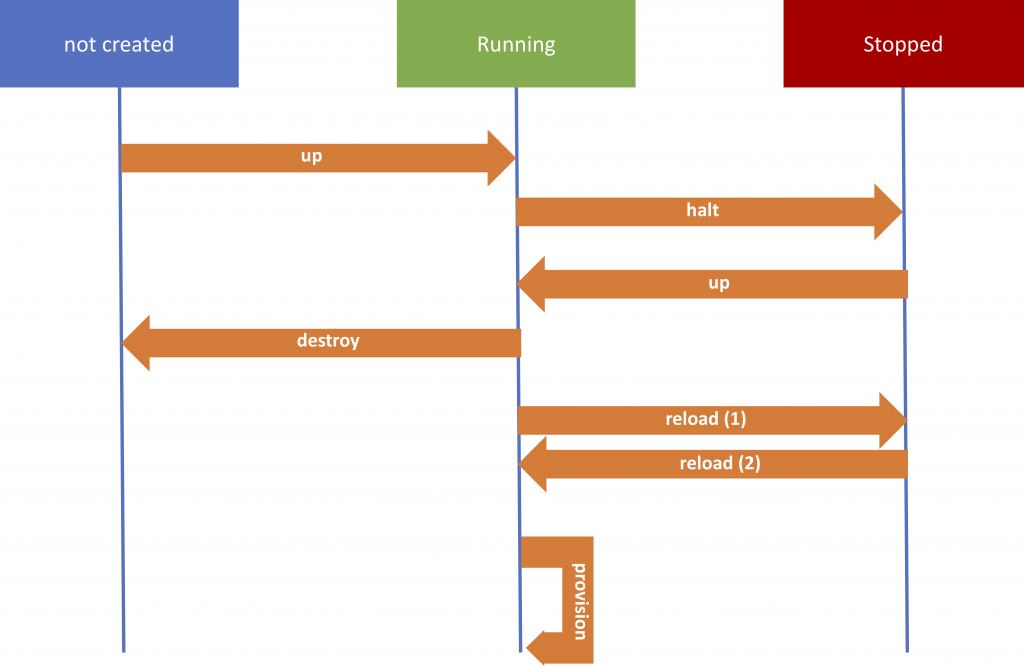
vagrant up
in the command line in the directory that contains the Vagrantfile. Usually, when you run a vagrant-command, Vagrant will climb up the directory tree and runs the first Vagrantfile it finds.
It can take a couple of minutes for the box (ubuntu/xenial64) to be downloaded, set-up and run. Voilà, now you should have an Ubuntu Linux in VirtualBox up and running. The virtual machine configuration is located in .vagrant in your /vagrant.
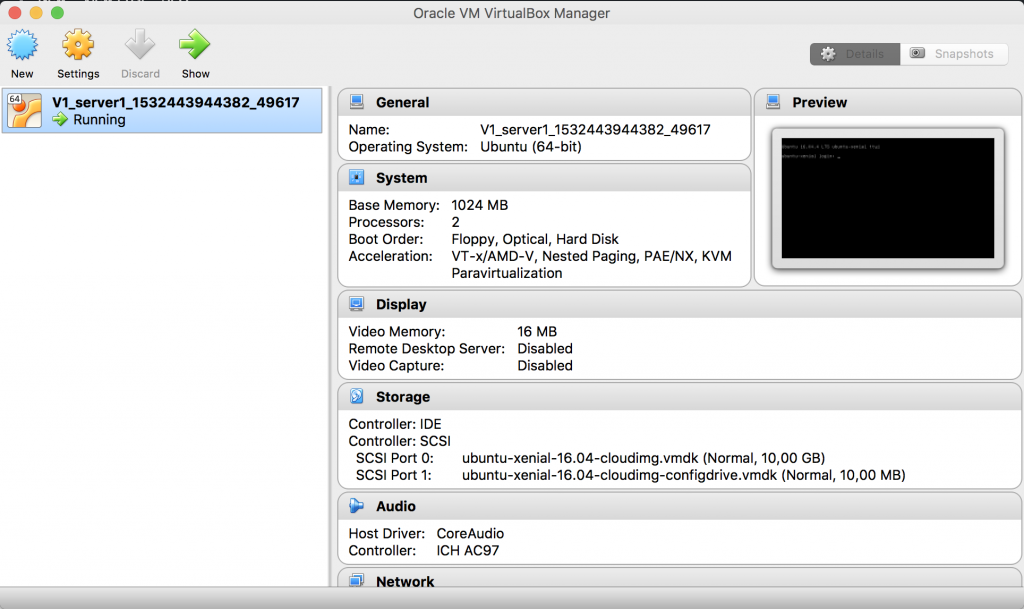
To see if your Virtual Box was created either open VirtualBox or by using
vagrant status
Current machine states:

server1                   running (virtualbox)

The VM is running. To stop this VM, you can run `vagrant halt` to
shut it down forcefully, or you can run `vagrant suspend` to simply
suspend the virtual machine. In either case, to restart it again,
simply run `vagrant up`.
To access the Virtual Machine use
vagrant ssh
To stop your VirtualBox, use
vagrant halt
Other command line instructions you will use are
vagrant destroy– to stop and delete the Virtual Machinevagrant reload– to restart the environment and applying the settings in the Vagrantfile again, without destroying the Virtual Machine.vagrant provision– executes the provision part in the Vagrantfile (to re-configure the environment)
For more on Vagrant commands use vagrant --help or consult the documentation.
The Vagrantfile
Now we will use a Vagrantfile to create two Virtual Machines that we will later use to install Jenkins and SonarQube. I will first provide the Vagrantfile and go into more detail below.
Vagrant.configure("2") do |config|
    config.vm.define "server1" do |web|
        web.vm.provider "virtualbox" do |vb|
           vb.memory = "2048"
           vb.cpus = "1"
        end
        web.vm.box = "ubuntu/xenial64"
        web.vm.hostname = "server1"

        web.vm.network "private_network", type: "dhcp"

        web.vm.provision "file", source: "~/.ssh/id_rsa.pub", destination: "~/.ssh/authorized_keys"
        web.vm.provision "shell", inline: "which python || sudo apt -y install python"

    end

    config.vm.define "server2" do |web|
        web.vm.provider "virtualbox" do |vb|
           vb.memory = "2048"
           vb.cpus = "2"
        end
        web.vm.box = "ubuntu/xenial64"
        web.vm.hostname = "server2"

        web.vm.network "private_network", type: "dhcp"

        web.vm.provision "file", source: "~/.ssh/id_rsa.pub", destination: "~/.ssh/authorized_keys"
        web.vm.provision "shell", inline: "which python || sudo apt -y install python"

    end

end
To install and run the two Virtual Machines, use
vagrant up
Using vagrant status you should now see something like this
Current machine states:

server1                   running (virtualbox)
server2                   running (virtualbox)

This environment represents multiple VMs. The VMs are all listed
above with their current state. For more information about a specific
VM, run `vagrant status NAME`.
Instead of using vagrant ssh you should now be able to log into your newly created Virtual Machines using their IP-address and ports (vagrant is the default-user). I configured the Virtual Machines to retrieve the IP addresses via DHCP. You can obtain the ssh-information with
vagrant ssh-config [server-name], e.g. vagrant ssh-config server1
You should retrieve an output such as
Host server1
  HostName 127.0.0.1
  User vagrant
  Port 2222
  UserKnownHostsFile /dev/null
  StrictHostKeyChecking no
  PasswordAuthentication no
  IdentityFile /Users/vividbreeze/vagrant/.vagrant/machines/server1/virtualbox/private_key
  IdentitiesOnly yes
  LogLevel FATAL
Now you can log into server1 using (server2 respectively)
ssh vagrant@127.0.0.1 -p2222
The vagrant-user has sudo privileges by default. If you want to switch to the root user, simply use
sudo su
You can set/change the root-user password with
sudo passwd root
Provider Configuration
We can configure our provider (VirtualBox) with specific parameters, in this case, the memory and the number of CPUs. More on the configuration of the different providers can be found in the Vagrant documentation.
web.vm.provider "virtualbox" do |vb|
   vb.memory = "1024"
   vb.cpus = "1"
end
Network Settings
In the example, I let the DCHP server assign an IP in the private network (not accessible from the Internet) to the Virtual Machine:
config.vm.network "private_network", type: "dhcp"
You can also assign static IP to the Virtual Machine using
web.vm.network "private_network", ip: "192.168.33.11"
In addition, you can define a public network, so your machine will be accessible from outside the host machine
web.vm.network "public_network"
If you have more than one network (which is often the case), you will be prompted to select a network after running vagrant up. You specify the network using (you need to provide the full name
web.vm.network "public_network", bridge: "en0: Wi-Fi (AirPort)"
Some providers, such as VirtualBox, can be run in a closed environment that is not accessible from the machine it is running on. Port Forwarding enables you to create rules to forward traffic from the host machine to the VirtualMachine.
web.vm.network "forwarded_port", guest: 80, host: 8080
For more about Network configuration, please consult the Vagrant documentation.
Provisioning
Provisioning means to configure the environments via shell scripts or configuration management tools such as Chef or Ansible. We will only do a basic configuration here. As I will use Ansible for provisioning the machine, Python has to be installed.
web.vm.provision "file", source: "~/.ssh/id_rsa.pub", destination: "~/.ssh/authorized_keys"
web.vm.provision "shell", inline: "which python || sudo apt -y install python"
You can also call other provisioning tools, such as Ansible Playbooks directly from the Vagrantfile.
web.vm.provision "ansible" do |ansible|
   ansible.playbook = "playbook.yml"
end
SSH
Most of the Vagrant boxes come with two users – root and vagrant (password: vagrant). You can log into a box by using vagrant ssh [machine-name]. You can omit this when overwriting the ~/.ssh/authorized_keys file with a new file that includes the public key of your host machine. You then can log into the machine with ssh vagrant@[machine-url] -p [port].
web.vm.provision "file", source: "~/.ssh/id_rsa.pub", destination: "~/.ssh/authorized_keys"
Shared Folders
Although not used in the example, you are able to share files between your Virtual Machine and your local environment.
web.vm.synced_folder "./sync_folder", "/vagrant", create: true
This allows you e.g. to store the configuration on your local machine to easily and quickly reconfigure the software running on your remote machines without connection the server via ssh.
Further Remarks
Vagrant is an easy way to design simple infrastructure as code, mainly used in development environments, e.g. you cannot design a large infrastructure with several components spanning different networks. In the latter case, I recommend using Terraform or Apache Mesos.
I use Vagrant mainly for testing changes of a configuration before I roll it out in production, e.g. I use a local Jenkins VM, running with the same (virtual) hardware configuration as in production on my local machine. Hence, I test changes of the build pipeline or the configuration of plugins locally before rolling them out on the production system. I also use it for testing new software before I role it out in production.
Tools that are in a way similar to Vagrant (for setting up infrastructure as code for a development environment) are Nanobox or Docker.
Of course, this was only a short tutorial that should provide you with the basics to set-up a virtual machine in Vagrant. For further reading, I recommend the Vagrant Documentation.
Links
- Vagrant Provider for Google Cloud, including a Quickstart Guide
- Vagrant Provider for AWS, including a Quickstart Guide
Kommentare
4 Kommentare zu „Vagrant in a Nutshell“
[…] this tutorial, we will configure one of the two machines, we set-up in the previous tutorial. In the tutorial, we copied the public keys of our local machine to the authorized_keys of the […]
[…] tutorial builds up upon the previous introductions to Vagrant and Ansible. Firstly, we will set up a Vagrant Box with Amazon Web Services (AWS). Subsequently, we […]
[…] we set up a cluster, consisting of Virtual Machines. We have used Vagrant before to create Virtual Machines on our local machine. Here, we will use Docker to create virtual […]
[…] use the following Vagrantfile. The details are explained in Vagrant in a Nutshell. You might want to experiment with the virtual box […]