In this previous introduction, I explained the Docker basics. Now we will write a small web-service and deploy it inside of a Docker container.
Prerequisites
You should have Docker (community edition) installed on the machine you are working with. As I will use Java code, you should also have Java 8 (JDK) locally installed. In addition, please create a free account at DockerHub.
For the first steps, we will use this simple web service (DataService.java), that returns a short message and an id (random integer). This code is kept simple on purpose.
import javax.xml.transform.Source;
import javax.xml.transform.stream.StreamSource;
import javax.xml.ws.Endpoint;
import javax.xml.ws.Provider;
import javax.xml.ws.WebServiceProvider;
import javax.xml.ws.http.HTTPBinding;
import java.io.StringReader;

@WebServiceProvider
public class DataService implements Provider<Source> {

    public static int RANDOM_ID = (int) (Math.random() * 5000);
    public static String SERVER_URL = "http://0.0.0.0:8080/";

    public Source invoke(Source request) {
        return new StreamSource(new StringReader("<result><name>hello</name><id>" + RANDOM_ID + "</id></result>"));
    }

    public static void main(String[] args) throws InterruptedException {
        Endpoint.create(HTTPBinding.HTTP_BINDING, new DataService()).publish(SERVER_URL);
        Thread.sleep(Long.MAX_VALUE);
    }
}
The web service listens to 0.0.0.0 (all IP4 addresses on the local machine) as we use this class inside a Docker container. If we would use 127.0.0.1 instead (the local interface inside of the container) requests from outside the request would not be handled.
To use the service, compile the source code by using
javac DataService.java
Then run our service with
java DataService
The service should return a result when called
curl localhost:8080
<?xml version="1.0" ?><result><name>hello</name><id>2801</id></result>%
The Docker Image
Now we want to run this service inside a Docker Container. Firstly, we have to build the Docker image. Therefore we will create a so-called Dockerfile with the following content.
FROM openjdk:8

COPY ./DataService.class /usr/services/dataservice/

WORKDIR /usr/services/dataservice

CMD ["java", "DataService"]
FROM openjdk:8loads the base image from Docker Hub and runs it.COPY ./DataService.class /usr/services/dataservice/copies our bytecode to a working directory inside of the container.WORKDIR /usr/services/dataservicesets this folder as our working directory for all our subsequent commands.CMD ["java", "DataService"]executes the java-command with our DataService binary code.
Based on this image description, we now build our images tagged with the name dataservice-image
docker build -t dataservice-image .
Sending build context to Docker daemon  580.1kB
Step 1/4 : FROM openjdk:8-alpine
8-alpine: Pulling from library/openjdk
8e3ba11ec2a2: Pull complete
311ad0da4533: Pull complete
df312c74ce16: Pull complete
Digest: sha256:1fd5a77d82536c88486e526da26ae79b6cd8a14006eb3da3a25eb8d2d682ccd6
Status: Downloaded newer image for openjdk:8-alpine
 ---> 5801f7d008e5
Step 2/4 : COPY ./DataService.class /usr/src/dataservice/
 ---> e539c7ae3991
Step 3/4 : WORKDIR /usr/src/dataservice
Removing intermediate container 51e2909dd1b5
 ---> 8e290a1cc598
Step 4/4 : CMD ["java", "DataService"]
 ---> Running in f31bba4d05de
Removing intermediate container f31bba4d05de
 ---> 25176dbe486b
Successfully built 25176dbe486b
Successfully tagged dataservice-image:latest
When Docker builds the image, you will see the different steps as well as a hash-code of the command. When you rebuild the image, Docker uses this hash-code to look for any changes. Docker will then only execute the command (and all subsequent commands) when the command has changed. Let us try this
docker build -t dataservice-image .
Sending build context to Docker daemon  580.1kB
Step 1/4 : FROM openjdk:8-alpine
 ---> 5801f7d008e5
Step 2/4 : COPY ./DataService.class /usr/src/dataservice/
 ---> Using cache
 ---> e539c7ae3991
Step 3/4 : WORKDIR /usr/src/dataservice
 ---> Using cache
 ---> 8e290a1cc598
Step 4/4 : CMD ["java", "DataService"]
 ---> Using cache
 ---> 25176dbe486b
Successfully built 25176dbe486b
Successfully tagged dataservice-image:latest
As nothing has changed, Docker uses the cached results and hence can build the image in less than a second. If we e.g. change step 2, all subsequent steps will run again.
Our image should now appear in the list of Docker images on our computer
docker images ls
REPOSITORY          TAG                 IMAGE ID            CREATED             SIZE
dataservice-image   latest              d99051bca1c7        4 hours ago         624MB
openjdk             8                   8c80ddf988c8        3 weeks ago         624MB
I highly recommend giving the image a name (-t [name] option) or a name and a tag (-t [name]:[tag]), as you are able to later reference the image by its name instead of its id.
Docker stores these image on your localhost, e.g. at /var/lib/docker/graph/<id> (Debian), or /Users/[user-name]/Library/Containers/com.docker.docker/Data on a Mac.
Other commands regarding the image that might become useful are
# get details information about the image (good for debugging)
docker image inspect dataservice-image

# delete an image
docker image rm dataservice-image

# remove all images
docker image rm $(docker image ls -a -q)

# remove all images (with force)
docker image rm -f $(docker image ls -a -q)

# show all docker image commands
docker image --help
Running the Container
Now that we build our image, we can finally run a container with our image
docker run --name dataservice-container -d -p4000:8080 dataservice-image
The -d option stands for daemon, i.e. the container runs as a background process. The -p option maps the container-internal port 8080, to a port on your local machine that runs docker (4000). The --name option gives the container a name, by which it can be referenced when using docker container commands.
You should now see the container in the list of all containers with
docker container ls
CONTAINER ID        IMAGE               COMMAND              CREATED             STATUS              PORTS                    NAMES
4373e2dbcaee        dataservice-image   "java DataService"   3 minutes ago       Up 4 minutes        0.0.0.0:4000->8080/tcp   dataservice-container
If you don’t use the --name option, Docker will generate a name for you, e.g.
CONTAINER ID        IMAGE               COMMAND              CREATED             STATUS              PORTS                    NAMES
4373e2dbcaee        dataservice-image   "java DataService"   3 minutes ago       Up 4 minutes        0.0.0.0:4000->8080/tcp   distracted_hopper
Now let us call our service that resides inside the container with
curl localhost:4000
<?xml version="1.0" ?><result><name>hello</name><id>1842</id></result>
You can stop the container from running with
docker container stop dataservice-container
The container now won’t appear when using docker container ls, as this command only shows the running containers. Use docker container ls -a instead.
Other useful commands for Docker containers are
# kills a container (stop - is a graceful shutdown (SIGTERM), while kill will kill the process inside the container (SIGKILL))
docker container dataservice-container

# removes a container, even if it is running
docker container rm dataservice-container

# removes all containers
docker container rm $(docker container ls -a -q)

# show STDOUT and STDERR from inside your container
docker logs --follow

# execute a command from inside your container
docker exec -it dataservice-container [command]

# log into your container
docker exec -it dataservice-container bash
# shows a list of other docker container commands
docker container --help
Publish your Image on DockerHub
So now that we have successfully created and run our first Docker Image, we can upload this image to a registry (in this case DockerHub) to use it from other machines.
Before we continue, I want to clarify the terms registry and repository, as well as the name-space that is used to identify an image. These terms are used a bit differently, than in other contexts (at least in my opinion) which might lead to confusion.
The Docker image itself represents a repository, similar to a repository in git. This repository can only exist local (as until now), or you can host it on a remote host (similar to GitHub or Bitbucket for git repositories). Services, that host repositories are called registries. GitHub or Bitbucket are registries that host git repositories. DockerHub, Artifactory or AWS Elastic Container Registry are registries that host Docker repositories (aka Docker images).
An image name is defined by a repository-name and a tag. The tag identifies the version of the image (such as 1.2.3 or latest). So the repository can contain different versions of the image.
Before we can push our Docker image to a registry (in this case DockerHub) we have to tag our image (this might seem a bit odd).
docker tag [image-name|image-id] [DockerHub user-name]/[repository-name]:[tag]
docker tag dataservice-image vividbreeze/docker-tutorial:version1
Now let us have a look at our images
docker image ls
REPOSITORY                    TAG                 IMAGE ID            CREATED             SIZE
dataservice-image             latest              61fe8918855a        10 minutes ago      624MB
vividbreeze/docker-tutorial   version1            61fe8918855a        10 minutes ago      624MB
openjdk                       8                   8c80ddf988c8        3 weeks ago         624MB
You see the tagged-repository is listed with the same image-id. So both repository names are identifiers, that point to the same image. If you want to delete this link you have to use
docker image rm vividbreeze/docker-tutorial:version1
Next, we have to log in your remote registry (DockerHub)
docker login
Now we can push the image to DockerHub
docker push vividbreeze/docker-tutorial:version1
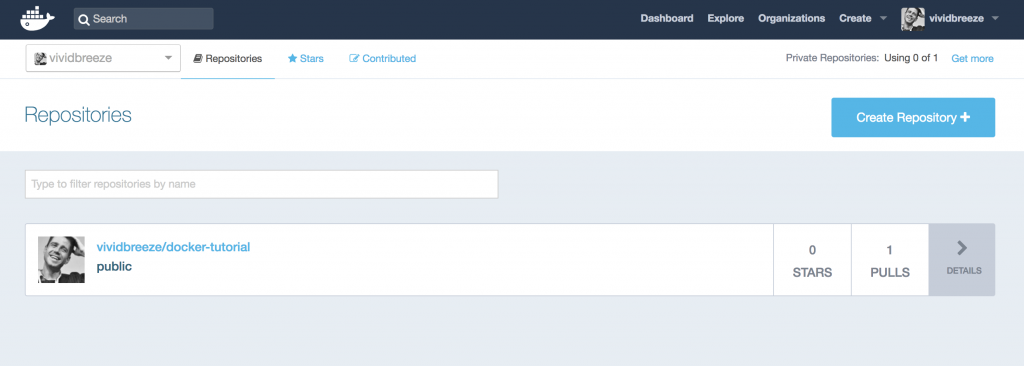
If you log into DockerHub you should see the image (repository) (sometimes it might take a while before it appears in the list).
To run this image use
docker run --name docker-container -d -p4000:8080 vividbreeze/docker-tutorial:version1
If the image is not present (which it now is), Docker would download the image from DockerHub before it runs it. You can try this if you delete the image and run the command above. You can also use this command from every other machine that runs docker.
So basically the command above downloads the image with the name vividbreeze/docker-tutorial and the tag version1 from your DockerHub registry.
You might notice that this image is very large (about 626 MB)
docker image inspect vividbreeze/docker-tutorial:version1 | grep Size
On DockerHub you will see that even the compressed size is 246 MB. The reason is, that the Java8 base-image and the images the base-image is based on are included in our image. You can decrease the size by using a smaller base-image, e.g. openjdk:8-alpine, which is based on Alpine Linux. In this case, the size of the image is only about 102 MB.
Troubleshooting
If you run into problems, I recommend having a look at the logs inside of your Docker container. You can access the messages that are written to STDOUT and STDERR with
docker logs
Often you can see if the start of your application has already failed or the call of a particular service. You can use the --follow option to continuously follow the log.
Next, I suggest logging into the Docker container to see if your service is running
docker exec -it dataservice-container bash
(you can call any Unix command inside of your container docker exec -it [container-name] [command]). In our example, try curl 127.0.0.1:8080. If the service is running correctly inside of the container, but you have problems calling the service from the outside, there might be a network problem, e.g. the port-mapping was wrong, the port is already in use etc. You can see the port-mapping with docker port docker-container.
However, you should make sure that the commands you execute in the container are available, e.g. if you use a small image, such as the alpine-Linux distribution, commands such as bash or curl won’t be available. So you have to use sh instead.
Another (sub-)command that is useful with (almost) all docker commands is inspect. It gives you all the information about an image, a container, a volume etc. that are available, such as mapped volumes, network information, environment variables etc.
docker image inspect dataservice-image
docker container inspect dataservice-container
Of course, there is more, but this basic knowledge should be sufficient to find the root cause of some problems you might run into.
Kommentare
2 Antworten zu „Docker Basics – Part II“
[…] us get started. In this introduction, we will run images that are available on DockerHub. In the next part, we will focus on custom-images. So let us build a container that contains a nginx web […]
[…] this first part of the tutorial, we will work with the simple application of the Docker Basics Tutorial, that contains only one service. We will deploy this service more than one time and let run on only […]